Technical Report
Introduction
Shader is a crucial part in game development, it helps the developers create stunning and believing effects without having the actual mesh displaying the objects. So far, the class has only discussed about the use of vertex and fragment shaders to draw the surface of an object, but we have yet not discussed how to generate the inside of it. In fact, the standard Unity lighting system only capable of rendering flat surfaces and there is no attempt to probe into the object’s volume. There are multiple methods to overcome this limitation, volumetric rendering is one of them. In volumetric rendering, we probe a ray of light into the material’s volume, allowing us to create sophisticated visual effects.
A sphere inside a cube
In this section, I will look into how to use only shader codes to draw a sphere inside a cube mesh. There is no geometry definition to the sphere as it is only rendered by the shader codes.
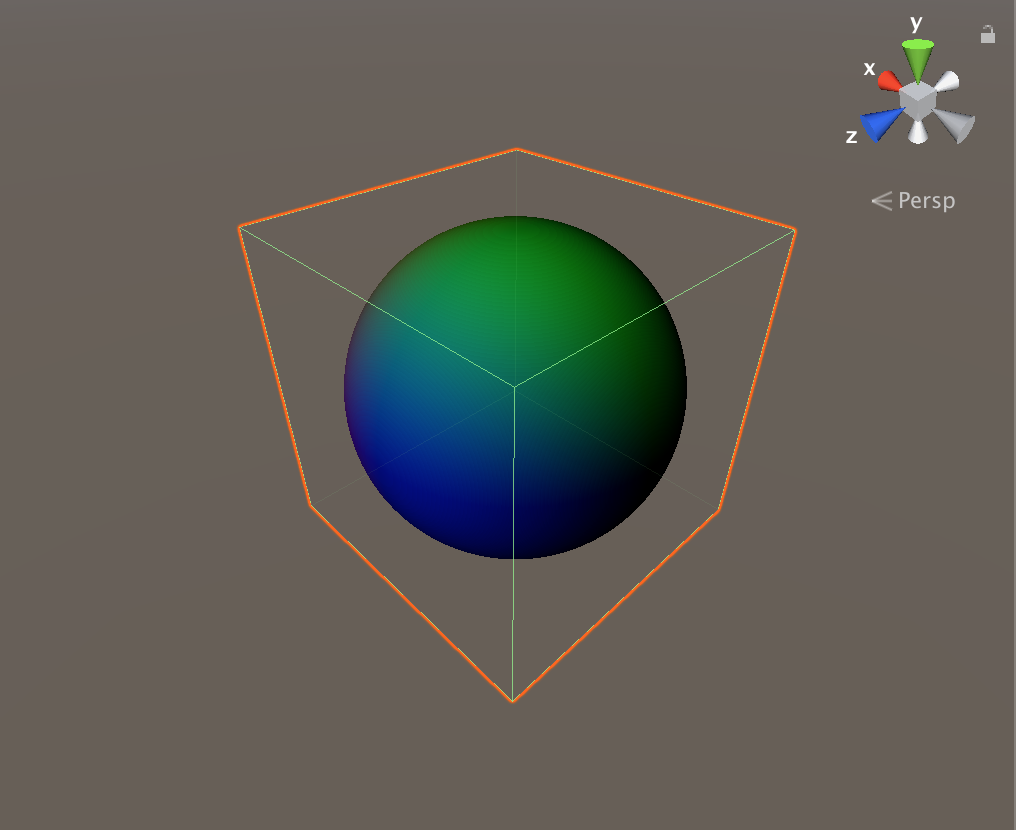
A sphere rendered only using shader codes.
To achieve the effect above, we first need to do ray marching from our camera view to the cube, and going into the cube’s interior. Calculating the view direction vector is simple using the Unity’s built in functions and variables.
The global (world) coordinate of a point on the cube is:
o.wPos = mul(unity_ObjectToWorld, v.vertex).xyz;
Using this, and the built in global camera position _WorldSpaceCameraPos, the view direction vector is:
float3 viewDir = normalize(i.wPos - _WorldSpaceCameraPos);
We then do a ray march from the mesh coordinate into the sphere, we will return the position of the point in the world space if the point is inside the sphere in question, otherwise we return the zero vector. To check if a point is inside a sphere, it is as simple as comparing the distance between the point and the center of the sphere to its radius.
float3 raymarch(float3 pos, float3 dir)
{
    for(int i = 0; i < STEPS; i++)
    {
        if (distance(pos, CENTER) < RADIUS)
            return pos;
        pos += dir * STEPS_SIZE;
    }
    return float3(0,0,0);
}
I hard-coded the CENTER and RADIUS of the sphere, therefore the position and the size of the cube will not effect the rendering of the sphere (although the cube has to be in range in order for the sphere to be visible).
Volumetric Fog
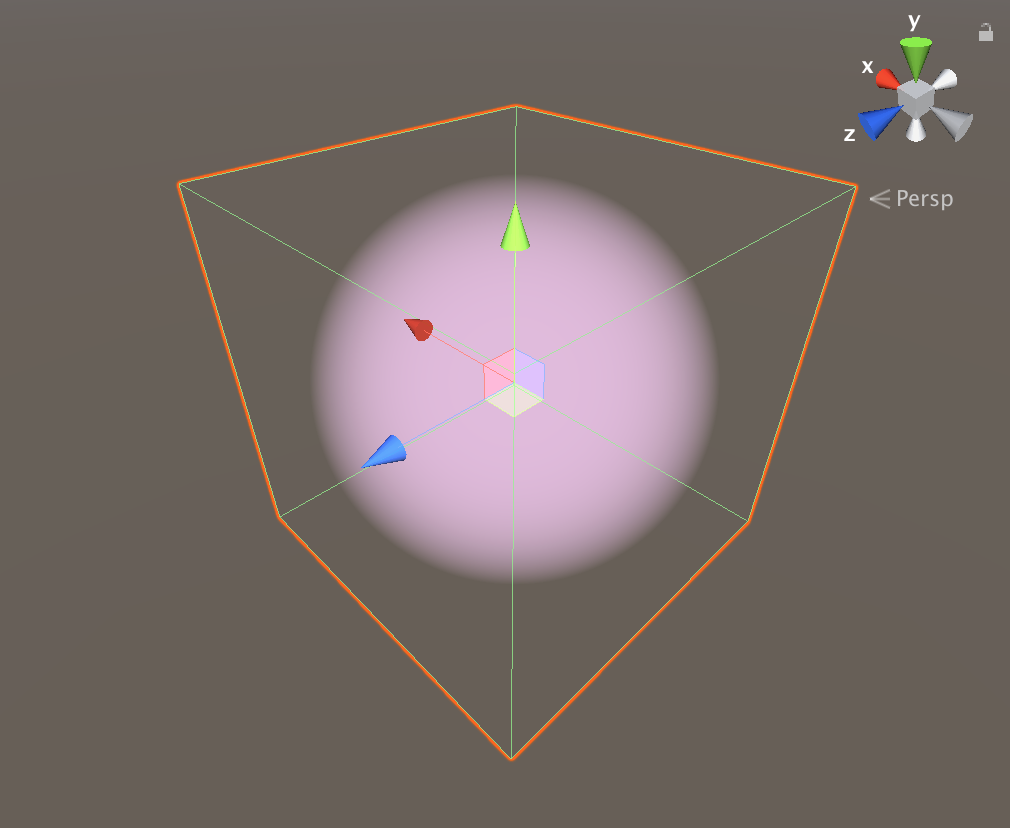
In this section, we will use shader code to generate volumetric fog in a sphere shape, with the highest intensity in the middle, then the intensity will decrease exponentially going toward the surface of the sphere.
3D Fog
In the previous section, the ray marching algorithm we used was relatively simple, by only comparing the distance from the pixel to the center of the sphere to the radius. However, it is a good idea to use a more general formula to find these points to sample fog. Consider the positions of the camera, and the sphere in question like below, taken from here
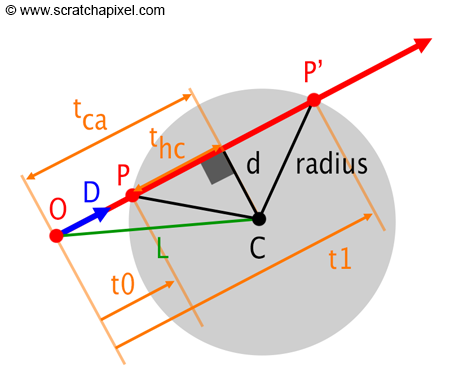
Where O is the camera position, D (normalized) is the view direction, P and P’ are the intersection points. We can express P and P’ as:
\[\begin{align*} P&=O+t_0D\\ P'&=O+t_1D \end{align*}\]Substituting to the sphere equation of $x^2+y^2+z^2=R^2$, we have:
\[\begin{align*} P^2-R^2&=0\\ (O+tD)^2-R^2&=0\\ O^2+2tOD+t^2D^2-R^2&=0\\ t^2D^2+2tOD+O^2-R^2&=0 \end{align*}\]Which boils down to a quadratic equation ($ax^2+bx+c=0$) with $a=D^2$, $b=2OD$ and $c=O^2-R^2$. With $\Delta=b^2-4ac$, the solutions to this equation is:
\[\begin{align*} t_0&=\frac{-b-\sqrt{\Delta}}{2a}\\ t_1&=\frac{-b+\sqrt{\Delta}}{2a} \end{align*}\]We then begin sampling fog amount from $t_0$, based on how far we are from the center of the sphere:
float clear = 1;
for (int i = 0; i < STEPS; i++)
{
    float3 position = localCam + viewDir * t0;
    float val = clamp(1 * (1-length(position)/RADIUS),0,1);
    float fogAmount = clamp(val * FOG_DEN,0,1);
    clear *= (1-fogAmount);
    t0 += stepDis;
}
return 1-clear;
The return value will be the accumulate intensity of fog at a particular pixel.
Volumetric Cloud
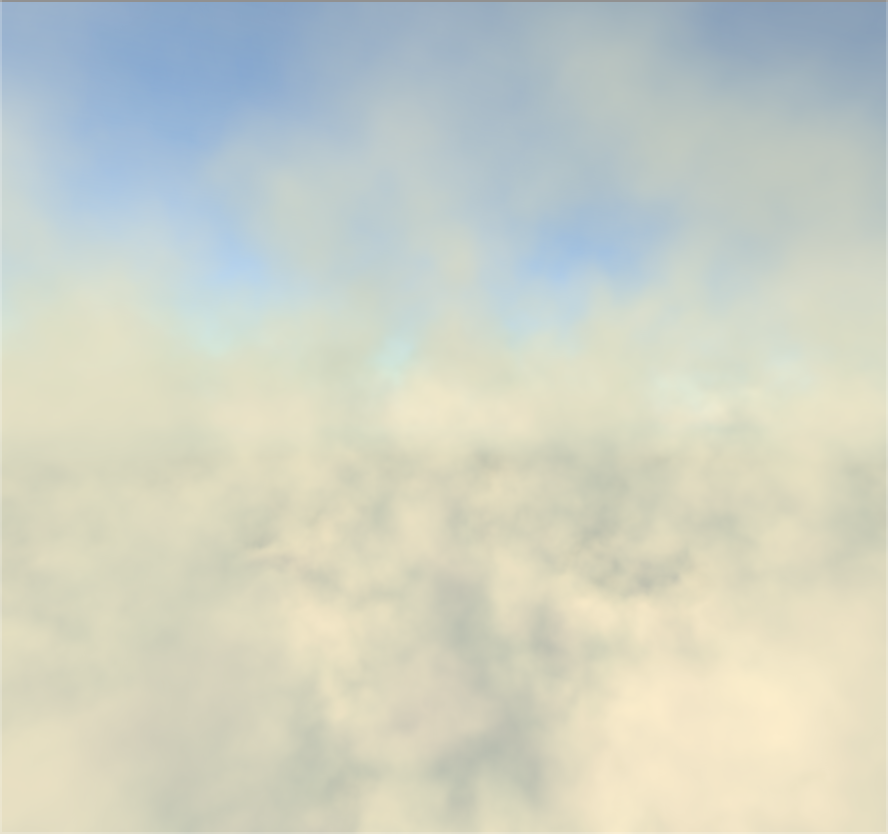
Volumetric Cloud rendered using Shader codes
Cloud is considered as fog, but it is more random. Although the technique of generating 3D cloud is similar as the technique discussed above, we need to incorporate noise to make it look natural. I chose to use value noise as it is perfect to generate cloud. Value noise is a type of noise commonly used as a procedural texture primitive in computer graphics. It is conceptually different from, and often confused with gradient noise, examples of which are Perlin noise and Simplex noise. This method consists of the creation of a lattice of points which are assigned random values. The noise function then returns the interpolated number based on the values of the surrounding lattice points.
Ray marching is used to calculate the accumulate intensity of cloud at a particular pixel on the screen. During the marching process, noise is generated (or sample from texture), then it will be added until either the maximum depth is reached or the pixel value becomes close to 0.99 (in which there is no reason to march beyond this point since we will not be able to see anything behind it).
Credits
- A Minimal Ray-Tracer: Rendering Simple Shapes (Sphere, Cube, Disk, Plane, etc.)
- Clouds
- Alan Zucconi. Volumetric Rendering
- Penny de Byl. Shader Development from Scratch for Unity with CG.
- The book of Shaders. Noise.
- Unity standard assets (for flycam effect).
Source Code
- The source code is available to download here.