Remote Editing with VSCode
There are numerous reasons why you would want to set up a pipeline which allows you to remotely edit codes on a server. In this tutorial, I will walk through the steps needed to set up VSCode for remote editing, as well as some tips I found useful that will help you have a better experience with VSCode.
For CSCI 2021: Remote editing is very beneficial because you don’t have to install any special software or extension on your own computer (except VSCode). VSCode also has a built-in terminal that you can use to run your code from the remote machine you’re currently editing on.
VSCode
Download
VSCode can be downloaded from the Microsoft website here. Make sure you download the version compatible with your OS.
You might want to get yourself familiar to VSCode if you haven’t used it before. This is a great text editor that offers many different features which can help enhance your coding experiences. You can have a look at Microsoft’s tutorial if you feel the need for it, this tutorial only focuses on remote editing capability of VSCode.
Installing VSCode Remote extensions
Open up VSCode, on the left panel, click on the extensions tab:
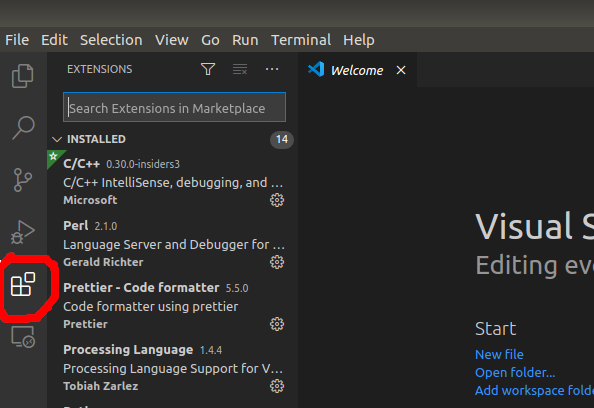
Search for “remote development” and install the package from Microsoft
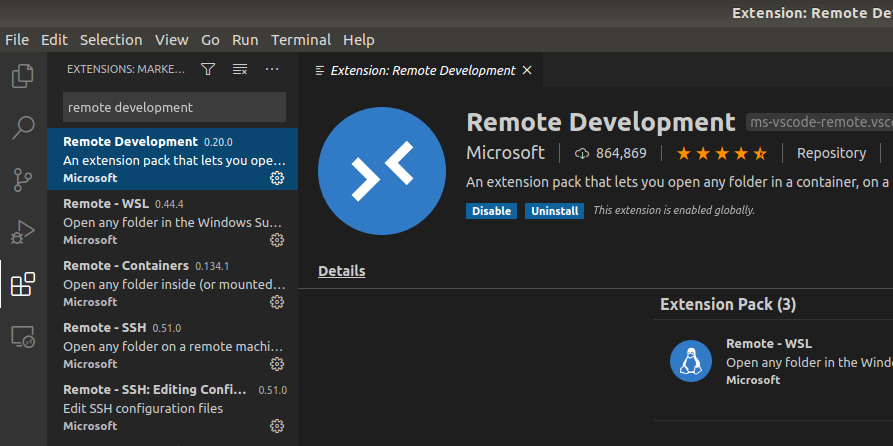
You can also have a look at this extension on the VSCode website: Remote Development
After installing the extensions, you might have to close and reopen VSCode.
If the installation process completed without any error, you should see a little
green icon appear at the lower left corner of VSCode:
![]()
Clicking on this icon will bring up the setup for Remote Development:
At this point, you need to decide what machine you want VSCode to
connect to when doing remote editing. Most CSE lab machines will work,
as long as they are running Linux. A full list of CSE lab machines can
be found here.
In this example, I will use atlas.cselabs.umn.edu as the destination machine.
You can use the same machine if you want.
First you need to make sure you can ssh to this machine, open a new Terminal session and type in the following command:
ssh x500@machine
Remember to replace x500 with your x500 and machine with the address of
the machine you want to connect to. In my case this command would be:
ssh dinh0080@atlas.cselabs.umn.edu
You might get something like this when you first connect to a particular remote machine:
The authenticity of host 'atlas.cselabs.umn.edu (128.101.38.193)' can't be established.
RSA key fingerprint is SHA256:hC61Slow+2OYpHeMb9idGs6w25DIDD/dRnT4lbo9TW8.
Are you sure you want to continue connecting (yes/no)?
Just type yes and hit enter, it will let you enter your password.
Note that you won’t be able to see anything on the screen while you type
your password. This password is the same one that you use for MyU.
If you see something like this, it means you have successfully connected to the desired remote machine:
Last login: Fri Jun 12 23:02:09 2020 from x.x.x.x
dinh0080@csel-atlas:/home/dinh0080 $
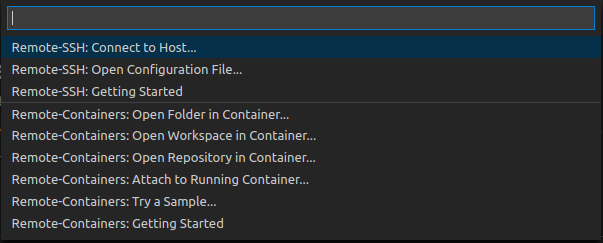
Back to VSCode, open up the Remote Development menu and select “Remote-SSH: Connect to Host…”.
Then click “Add New SSH Host…”. At this point you want to enter the
same command you used to connect to the remote machine, in my case, it
would be:

Hit Enter until the lower right of VSCode shows a notification saying it has successfully added the host.
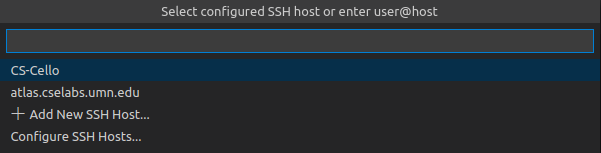
Now if you open up Remote Development menu and hit “Remote-SSH: Connect to Host…” again,
the host you just added will show up as an option:
Click on this host, the log will ask for your password, put in your password and wait a little bit
until the log settles, that’s when you know the connection is successful. You might
have to select the destination platform the first time you connect,
just select Linux:

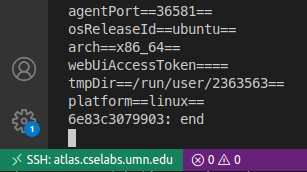
If the log shows something like below, the connection is successful:
13bf30366675: start
sshAuthSock====
agentPort==33565==
osReleaseId==ubuntu==
arch==x86_64==
webUiAccessToken====
tmpDir==/run/user/2363563==
platform==linux==
13bf30366675: end
You can also check the status of the connection by looking at the lower left corner of
VSCode, in this case it should show:
At this point, VSCode is in remote development mode. You can hit File->Open to open directories or files you have on the remote machine.
(Optional) Password-free Remote Development
It is very frustrating when you have to enter your password everytime you connect to the remote server. By creating a SSH key, you can authorize your machine (and at the same time, VSCode) to connect without password.
ONLY do this on your personal computer, with SSH key authorization, anyone will be able to connect to your CSELab home directory without your password.
First create a SSH key on your computer if you haven’t done so, open up Terminal and type:
ssh-keygen -t rsa -b 4096 -C "YOUR_INTERNET_ID@umn.edu"
The following will show up in your terminal. Press enter when you are asked where to save your SSH key. This will save it in the default location.
Generating public/private rsa key pair.
Enter file in which to save the key (~/.ssh/id_rsa):
Created directory '~/.ssh'.
When you are prompted to enter a passphrase, press enter again.
Enter passphrase (empty for no passphrase):
Enter same passphrase again:
You should now have two keys saved in ~/.ssh.
id_rsa - This is your private key and should be kept secret. Do not share
this with anyone or put this on the internet.
id_rsa.pub - This is your public key. It is safe to share this, and it can be
used to identify you uniquely when logging in.
You can obtain your public key by:
cat ~/.ssh/id_rsa.pub
For example, my public key is:
ssh-rsa AAAAB3NzaC1yc2EAAAADAQABAAACAQCs1cGa7smfmPCjqNTZ7Ytyg18jEgkGNPquHSp6iPsFZowDVDrpz9ttRaI0Qj1+VZ6Bl/iEadrsB1HdXbmAvsnzg4DDejndERqv1Uw0lXzl9e3UF8WzuZyAyLenOvTEI7Qfbc/jzQWBJ07dL4d02lxzoF61CXIyC4vOLSKi9bS2iHtUm5MJjGbIVTfL28Zgo0puHPsdfNr/CJaPXiyXKFOm6E8ld0RS0dEHhh/JayqkE0JrDBXwwUe8BBfRrn30zNf+00mLPO0+uBsmeKWh32DH7bE9a0Bsg4cLJw9x7cAY+N7W1y7roSpMkR1cqoZE+lBFOCW3lf1EplrM9yz18u2rUOHjXetHeS5wpp52grK8sWxGESxGRlIVNScCyI/HHNNrGGmOkU4i/rQt1L4cRb1nHLIiDEhBaJ62C9yBaaTjJknjigma2tiP18o4Uy3bJWADEANUsjscPf2Rq8lM5D11GqP/lNptrdmLEH7AB4eVjzCtHwBpX5g3lq+UP1DqoU4JABGTGv446eaHHtLs3iXSq8p/M3kZUXjk1OO9626i5dJ5gVp9TfEesjk7/1uHT2pLpliAO7Gz99q2K89deHAhvU7LJySKRID9ORfChGyT+sUMkErTQsJtdeJcmMEYLCoCJvyfU0ku+b8J8dtTveiSgWjf17T9bH8qA8BzGvyPcQ== dinh0080@umn.edu
Now, log in to one of the CSE lab machines (doesn’t matter which one). Then
cd to the .ssh directory. If this directory doesn’t exist, create it.
You can create a directory with the mkdir command:
mkdir .ssh
Make sure this directory is world executable:
chmod 755 .ssh
cd to this directory, use ls to check if you have a file named authorized_keys
already, if not, create this file using:
touch authorized_keys
Then you can append your public key to this file using:
echo "your-key" >> authorized_keys
The double quote is needed, in my case it would be:
echo "ssh-rsa AAAAB3NzaC1yc2EAAAADAQABAAACAQCs1cGa7smfmPCjqNTZ7Ytyg18jEgkGNPquHSp6iPsFZowDVDrpz9ttRaI0Qj1+VZ6Bl/iEadrsB1HdXbmAvsnzg4DDejndERqv1Uw0lXzl9e3UF8WzuZyAyLenOvTEI7Qfbc/jzQWBJ07dL4d02lxzoF61CXIyC4vOLSKi9bS2iHtUm5MJjGbIVTfL28Zgo0puHPsdfNr/CJaPXiyXKFOm6E8ld0RS0dEHhh/JayqkE0JrDBXwwUe8BBfRrn30zNf+00mLPO0+uBsmeKWh32DH7bE9a0Bsg4cLJw9x7cAY+N7W1y7roSpMkR1cqoZE+lBFOCW3lf1EplrM9yz18u2rUOHjXetHeS5wpp52grK8sWxGESxGRlIVNScCyI/HHNNrGGmOkU4i/rQt1L4cRb1nHLIiDEhBaJ62C9yBaaTjJknjigma2tiP18o4Uy3bJWADEANUsjscPf2Rq8lM5D11GqP/lNptrdmLEH7AB4eVjzCtHwBpX5g3lq+UP1DqoU4JABGTGv446eaHHtLs3iXSq8p/M3kZUXjk1OO9626i5dJ5gVp9TfEesjk7/1uHT2pLpliAO7Gz99q2K89deHAhvU7LJySKRID9ORfChGyT+sUMkErTQsJtdeJcmMEYLCoCJvyfU0ku+b8J8dtTveiSgWjf17T9bH8qA8BzGvyPcQ== dinh0080@umn.edu" >> authorized_keys
Make sure this file is world readable:
chmod 644 authorized_keys
You now have a password-free SSH connection set up.
Any additional question, don’t hestitate to ask us on Piazza or over email.